How to decorate a room with AI
Decorating a room used to mean holding a paint chip against the wall, squinting, and hoping. AI changes the order of operations. You photograph the room you have, describe the feeling you want, and get a redesigned version of your own space back in seconds, so you can judge the idea before you spend a cent. This guide walks you through the whole thing from your phone: what you need to begin, a clear step-by-step process, the small habits that produce far better results, and how to turn a good-looking generated image into a real shopping and painting plan you can act on. It also covers the mistakes that trip people up, and gives you a concrete walkthrough using MINIROOM AI on Google Play.
What you need before you start
You do not need a mood board, a budget spreadsheet, or design training. You need two things, and one of them is just a feeling.
- A clear photo of the room. One honest, well-lit shot of the space as it is today. The AI reworks what it can see, so a clear photo is the single biggest factor in a good result. Blurry, dark, or cramped photos give the tool less to work with and the redesign suffers for it.
- An idea of the feeling you want. You do not have to name a style yet. Start with a mood: calmer, warmer, brighter, cozier, more grown-up, less cluttered. That feeling is what you will translate into an instruction the AI can act on.
That is genuinely the whole list. If you already have a style in mind, even better, but a vague feeling is a fine place to begin. The point of working with AI is that you can refine the idea by seeing it, rather than having to get it fully formed in your head first. If you want the bigger-picture version of this workflow, our guide on how to use AI to design a room covers planning a whole space rather than just decorating one.
The step-by-step process for decorating with AI
The method below works in any capable tool, and it is the same one MINIROOM AI is built around. Follow it in order; each step feeds the next.
- Take a good photo. Stand back, get as much of the room in frame as you can, and shoot in daylight if possible. Hold the phone level rather than tilted. One wide, clear shot beats three tight, dark ones.
- Describe the look with a specific prompt. Name three things: the style, the colors, and one or two priorities. For example, "warm minimalist living room, soft cream and oak tones, add more storage and a reading corner." Specific instructions produce specific results; vague ones produce generic ones.
- Generate several options. Do not stop at the first image. Run the same prompt two or three times, or tweak one detail between runs, so you have a small set to compare rather than a single take you feel pressured to accept.
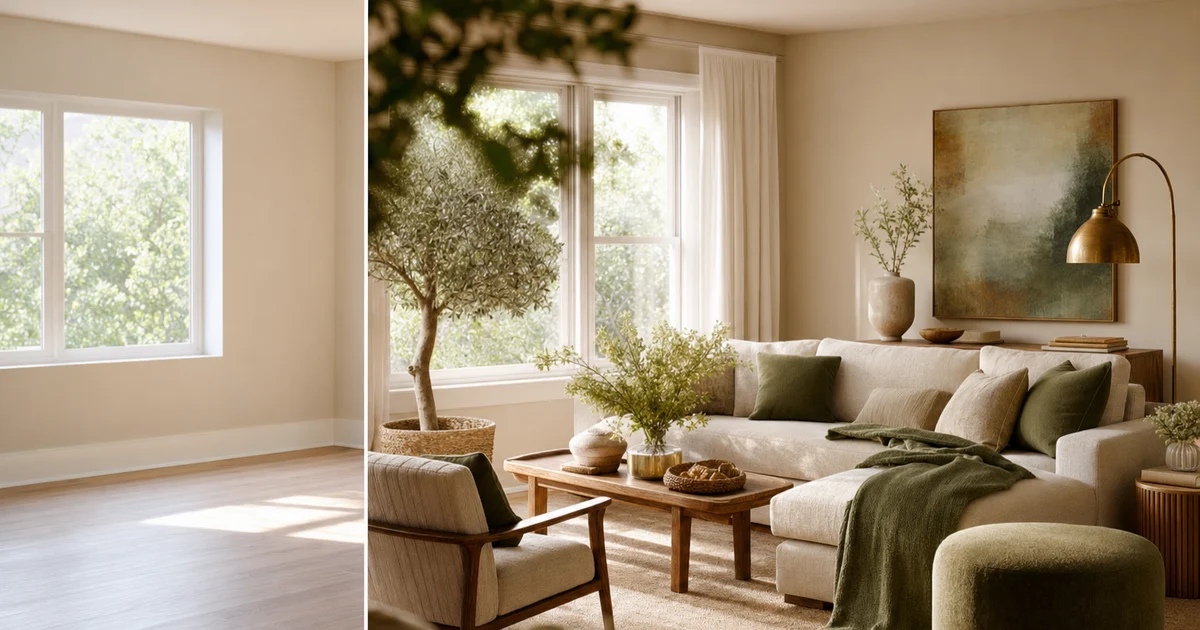
- Compare each option against the original. Put the redesign next to your real room. The question is not "is this pretty" but "does this work in my space, with my windows, my proportions, my light." That side-by-side is where good decisions actually get made.
- Save the ones you like, then refine. Keep your favorites, then push the best one further. Change the wall color, swap the rug, ask for a different sofa tone. Each refinement gets you closer to something you would actually live in.
Treat it as a loop, not a single shot. The first generation is a starting point you sharpen, not a verdict.
Tips for getting much better results
The difference between a disappointing AI redesign and a genuinely useful one usually comes down to a handful of small habits. None of these take longer than a few seconds.
- Get the lighting right in your photo. Shoot during the day with curtains open. Even, natural light helps the AI read your surfaces and colors accurately, so the redesign reflects your real room rather than guessing in the dark.
- Mind the angle. A straight-on or gentle corner view of the room gives the most usable result. Extreme angles, close-ups of one wall, or photos taken from a doorway crack tend to confuse the layout.
- Be specific in the prompt. "Make it nicer" gives the AI nothing to aim at. "Scandinavian bedroom, pale wood and white, warmer lighting, less clutter" gives it a clear target. If you are unsure what to name, browse our interior design styles guide and borrow the right words.
- Generate variations on a theme. Once one result is close, change a single variable and run it again: same room, different paint; same paint, different furniture tone. Isolating one change at a time teaches you what each choice does.
- Keep what works. If a generation nails the rug but ruins the sofa, note the rug and steer the next prompt to keep it. You are assembling a winning combination across several images, not waiting for one perfect render.
Specific input, compared honestly against your real room, refined one step at a time. That is the entire skill.
How to turn a generated image into a real plan
A beautiful render is not the goal; a room you can actually create is. The trick is to treat your favorite image as a checklist. Look at what changed between your original photo and the redesign, and write each change down as a concrete action.
- Paint. Note the wall color and finish. This is usually the highest-impact, lowest-cost change, so price it first and take a sample chip to match the tone in the image.
- Rug. Check the size, color, and texture. A rug anchors a room, and getting the dimensions right matters as much as the look.
- Lighting. Identify what the redesign did with light: a warmer bulb, a floor lamp in the corner, a pendant over the table. Lighting often does more for a mood than any single piece of furniture.
- Furniture tone. You may not replace the sofa, but the image might show it in a different color or a throw that shifts it. Note the tones you would need to match or add.
- Storage. Look for added shelving, a console, or baskets. Storage is frequently what makes the redesigned room feel calm, and it is easy to overlook.
- Plants and decor. List the greenery, art, and small objects. These are the cheap, fast finishing touches that close the gap between your room and the render.
Once every visible change is a line on your list, you have a shopping and painting brief. Tackle it in order of impact and budget: paint and lighting first, larger pieces later. The render stops being a daydream and becomes a plan.
Pitfalls to avoid
A few predictable mistakes turn AI decorating from useful into frustrating. Knowing them in advance saves you most of the pain.
- Treating the image as literal. AI renders are direction, not catalog pages. A generated lamp may not exist for sale. Read the image for its colors, proportions, and mood, then find real pieces that match, rather than hunting for the exact object on screen.
- Vague prompts. The most common reason for a dull result is a dull instruction. If you did not name a style, colors, and a priority, the AI had to guess, and its guess will be generic.
- A bad starting photo. Dark, tilted, or cluttered photos cap how good the redesign can be. Reshoot before you blame the tool.
- Chasing perfection in one generation. Expecting the first image to be final leads to disappointment. Generate several, compare, and refine.
- Ignoring your real constraints. A render does not know your radiator, your awkward doorway, or your rental rules. Sense-check every idea against what your room and your lease actually allow before you commit money to it.
- Forgetting it is a tool, not a designer. AI is fast and cheap to experiment with, which is its strength. For where it fits next to professional help, see AI interior design vs hiring a designer.
Avoid these six and the process stays quick, cheap, and genuinely useful.
A concrete MINIROOM AI walkthrough
Here is the full loop in MINIROOM AI, start to finish, from your phone. The app is available on Google Play, and the whole run takes a few minutes.
- Open the app and photograph your room. Stand back, capture as much of the space as you can in good daylight, and keep the phone level. You can also pick an existing photo from your gallery if it is clear and wide.
- Choose a style or write your prompt. Pick a style, then add your specifics: the colors you want and one or two priorities, such as more storage or a brighter feel. The more precise you are, the sharper the redesign.
- Generate the redesign. The app reimagines your actual room, keeping your real walls, windows, and proportions, so the result reflects your space rather than a showroom photo. Try the dedicated AI room decorator when you want to focus on decorating the room you already have.
- Compare against your original. View the redesign side by side with your real room to judge whether it genuinely works in your space, not just whether it looks good on its own.
- Generate a few more. Run variations, change one detail at a time, and build up a small set of options instead of settling for the first.
- Save, share, and refine. Keep the versions you like, share them with whoever you live with, and use your favorite as the shopping and painting brief from the section above.
Because every result is built on your own room, you are never guessing how a look will translate. You decorate by seeing, deciding, and only then buying. That is the entire promise of decorating a room with AI, and it costs you nothing but a few minutes to try.
Decorate your room with AI.
Open MINIROOM AI on Google Play, snap a photo, and see it redecorated.
Frequently asked questions
Can AI really decorate a room from just a photo?
Yes. Modern AI interior tools rework the room in your photo while keeping its real walls, windows, and proportions, so the redesign reflects your actual space rather than a generic template. The quality depends heavily on your input: a clear, well-lit, wide photo paired with a specific prompt produces a far more useful result than a dark photo and a vague request. Think of the output as a realistic direction to follow, not a literal catalog you can order item by item.
What should I write in the prompt to decorate a room?
Name three things: the style, the colors, and one or two priorities. For example, "warm minimalist living room, cream and oak tones, add storage and a reading corner." The style sets the overall look, the colors keep it coherent, and the priorities tell the AI what problem to solve in your space. Specific prompts produce specific results, while vague ones like "make it nicer" leave the tool to guess and usually return something generic.
How do I take a good photo for AI room decorating?
Shoot in daylight with the curtains open, stand back so you capture as much of the room as possible, and hold your phone level rather than tilted. A straight-on or gentle corner view works best. Avoid extreme angles, tight close-ups of a single wall, and dark or blurry shots, because they give the AI less to work with and cap how good the redesign can be. One clear, wide photo beats several cramped ones.
Is decorating a room with AI free?
Trying it is fast and low-cost, which is the main reason to use it: you can test many looks before spending anything on paint or furniture. MINIROOM AI is available on Google Play, and the experimenting itself takes only a few minutes per idea. The real savings come later, because seeing a redesign on your actual room helps you avoid expensive wrong purchases and returns.
How do I turn an AI redesign into something I can actually buy?
Treat your favorite image as a checklist. Compare it to your original photo and write down every visible change: paint color, rug, lighting, furniture tone, added storage, plants, and decor. Each change becomes a line on a shopping and painting brief. Tackle them in order of impact and budget, usually paint and lighting first, larger pieces later. You are matching the colors, proportions, and mood of the render with real items, not hunting for the exact objects on screen.
Why does my AI room result look generic or wrong?
The two usual causes are a vague prompt and a weak starting photo. If you did not name a style, colors, and a priority, the AI had to guess. If your photo was dark, tilted, or cluttered, it had little to work with. Fix the input first: reshoot in daylight, frame the whole room, and write a specific instruction. Then generate several options and refine the best one rather than expecting the first image to be perfect.
How many designs should I generate before deciding?
Generate at least a few, not one. Run the same prompt two or three times, then change a single detail between runs, such as the wall color or the furniture tone, so you can see what each choice does. Compare each option against your original room, save the ones that work, and refine your favorite from there. Decorating with AI is a loop of generate, compare, and refine, not a single shot you have to accept.
Is AI decorating a replacement for hiring an interior designer?
It depends on the project. AI is excellent for exploring ideas quickly and cheaply, seeing a look on your real room, and building a clear plan before you spend. A professional designer adds judgment, sourcing, project management, and accountability that software does not. Many people use AI to narrow their direction and then bring in a designer for the parts that need a human. Our guide on AI interior design versus hiring a designer compares the two in detail so you can choose what fits your room and budget.